Review by Geoff Hungerford:
Some of us will remember Len Surtees from quite a few years back when he flew Control Line stunt models and Free Flight hand launch gliders. Len was a champion with both indoor and outdoor hand launch gliders which saw him take world records and Australian records for indoor HLG. He still holds the Australian records for indoor categories 1, 2, 3 and 4 (various ceiling heights). Also he currently holds the Australian record for outdoor HLG for the most maxes in a row (1 minute flights). Because of these achievements Len was inducted into the MAAA Hall of Fame. Len was kitting his designs back then and we are fortunate to have him now kitting his new range of models here in Australia. These are his Sting Mark 2 versions.
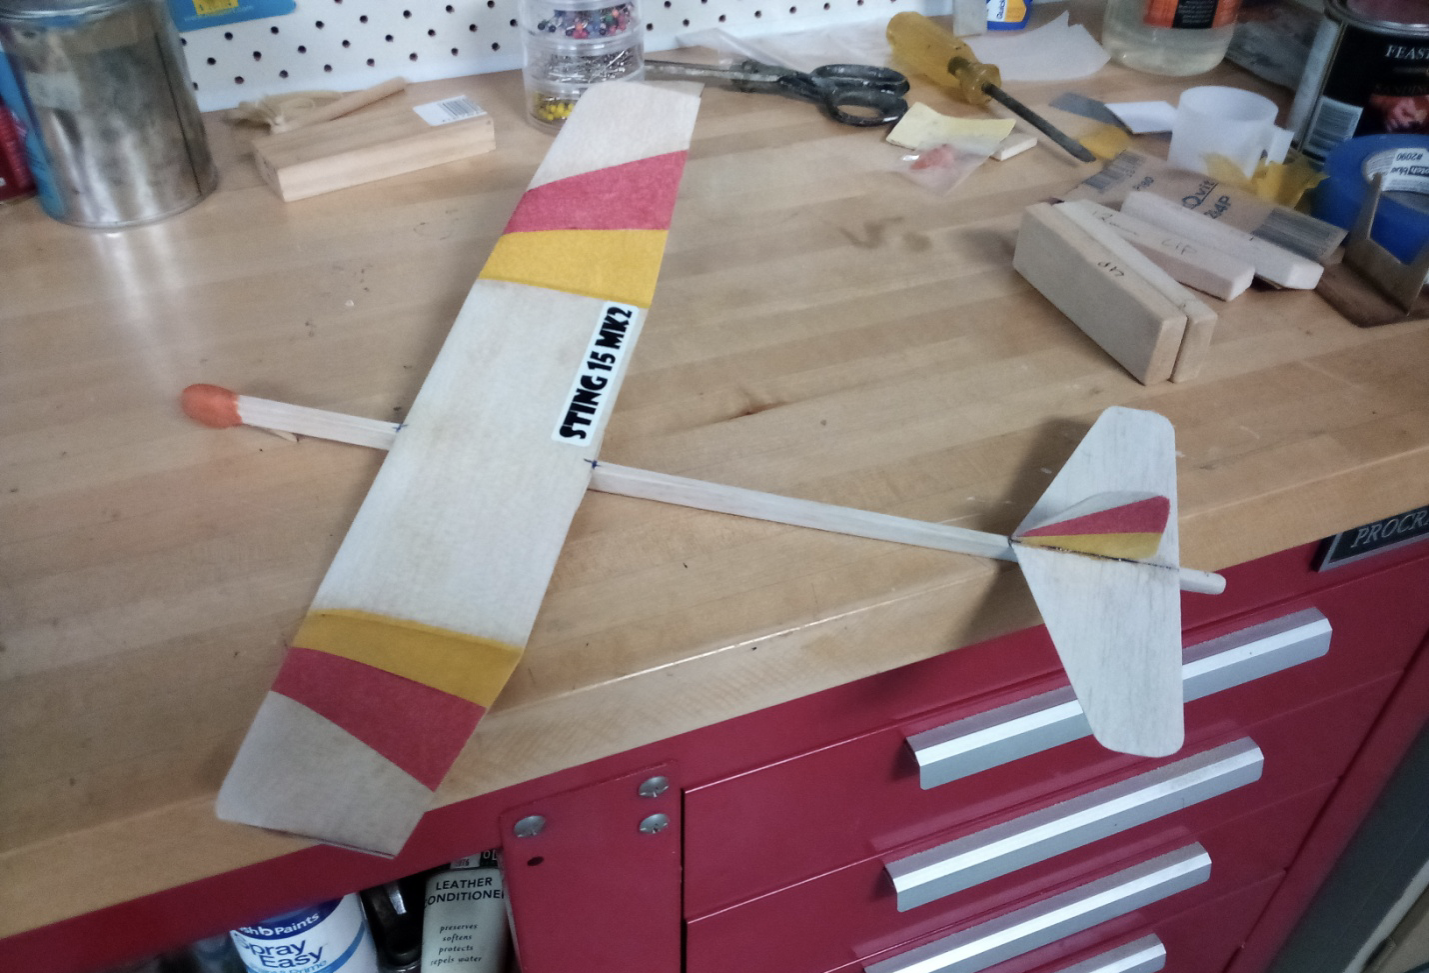
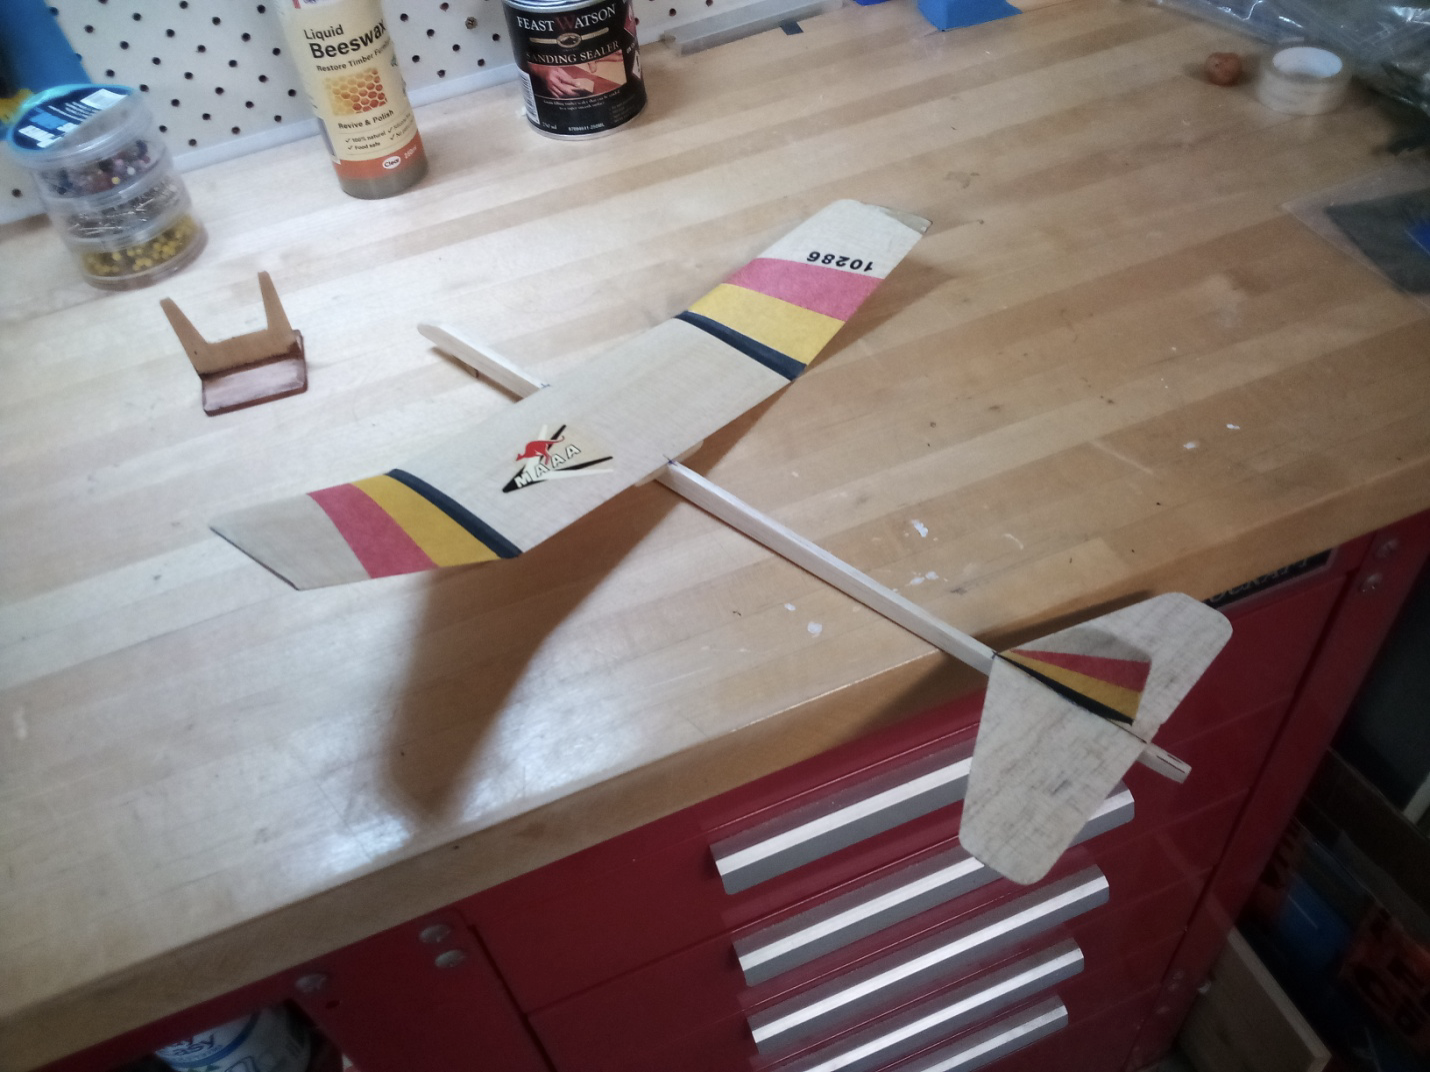
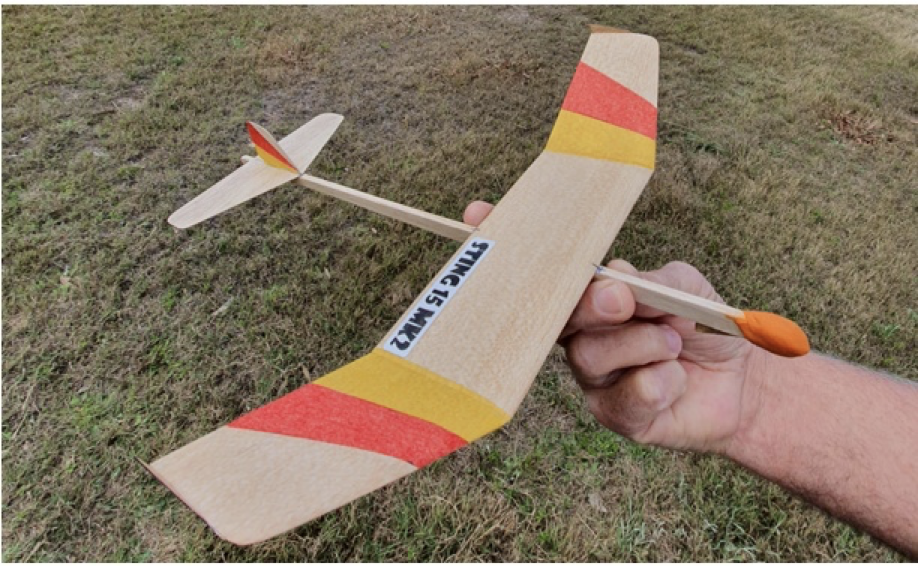
I have recently built a couple of the Sting 15 Mk2 Gliders which can be hand launched or catapult launched. This model is 15” wingspan, as the name suggests. Like all the Sting Mk2 range of kits, this one is of a very high standard and requires little more than gluing the parts together and a light sanding. Finding balsa of such high quality would be very difficult, but the kit is only $15 so why would you go chasing something you may not find.
This review is written so anyone who has never built a model aircraft can still get through the build easily and get the model to fly very well. Experienced aeromodellers will still find information in this article beneficial to them in their build.
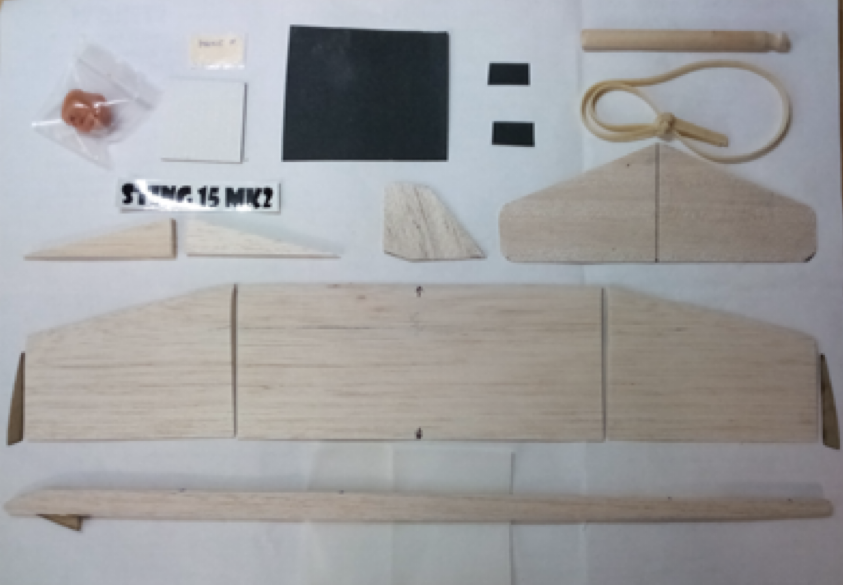
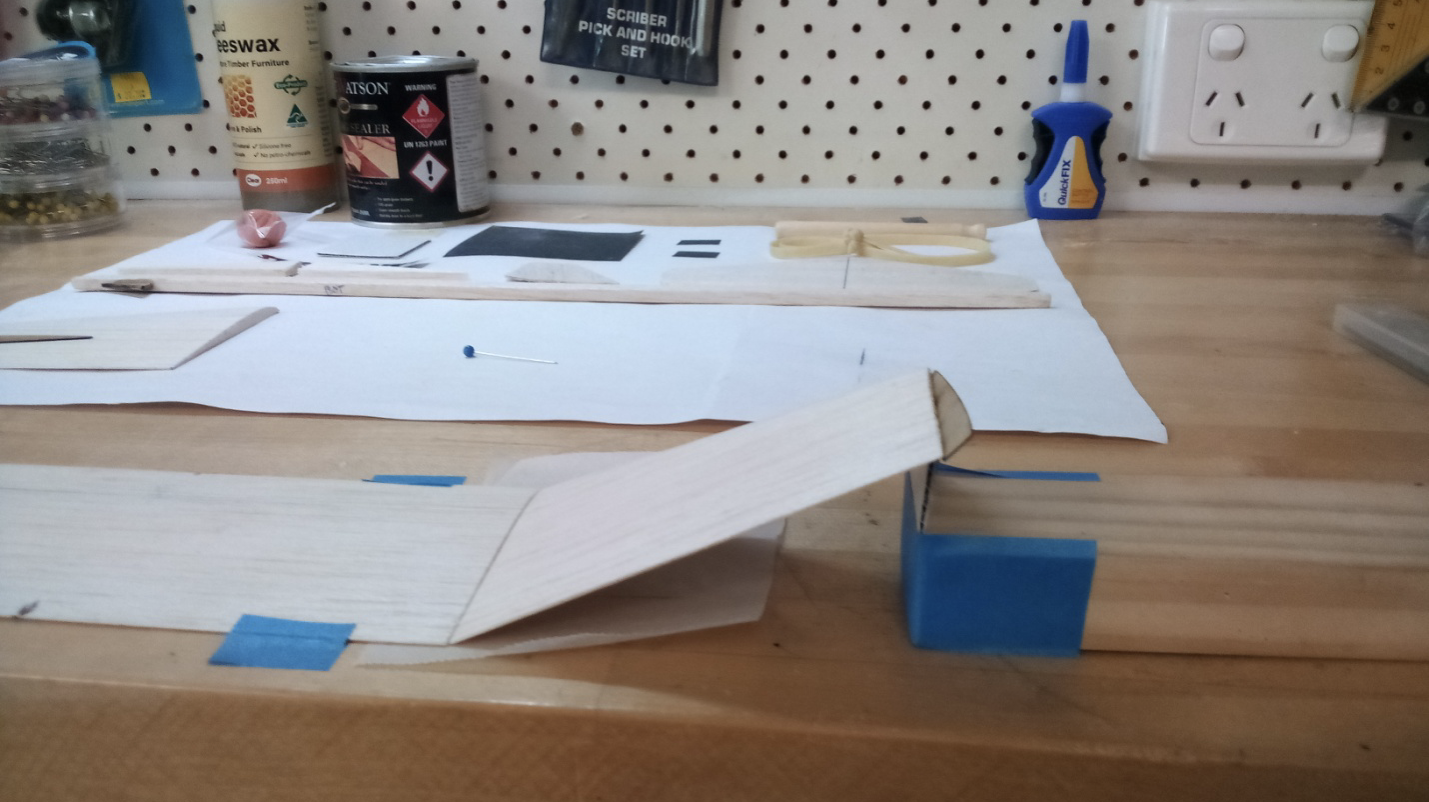
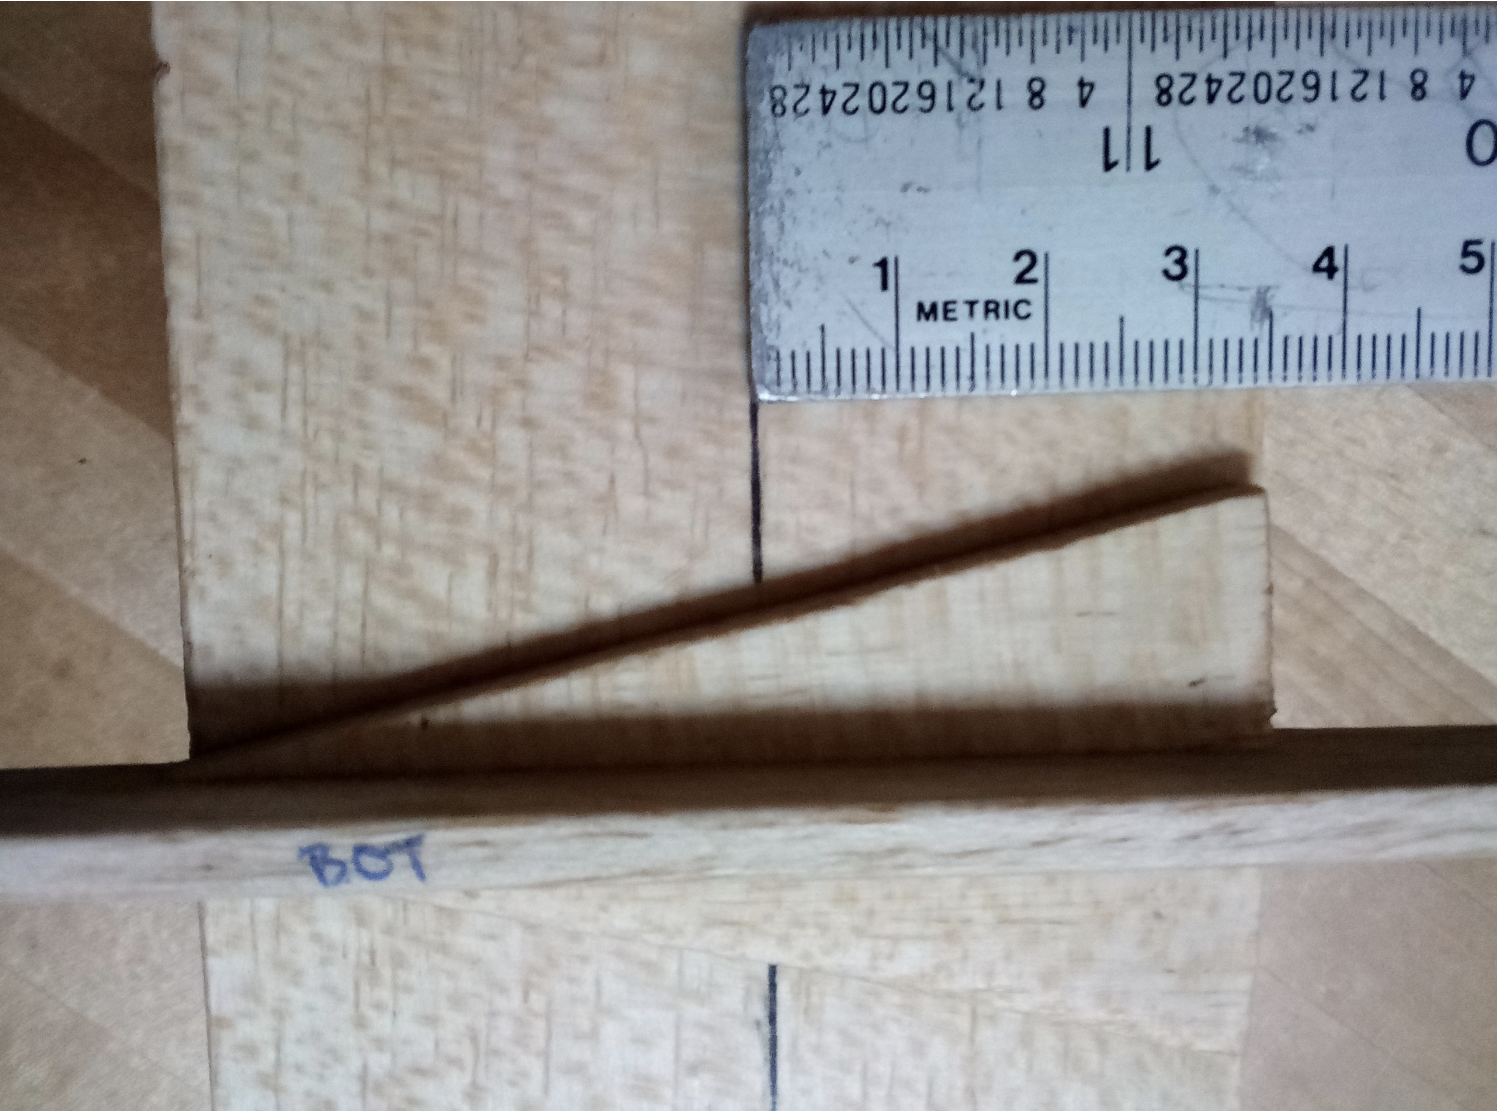
Upon opening the bag and laying out the parts you will see all the hard work has been done. Even the wing section is pretty much shaped. Apart from the actual glider components the kit contains a building guide, the stick and rubber for the catapult, sandpaper, a piece of wax paper to put under each wing joint so you don’t glue the wing to the building board, a lump of plasticine for nose weight and tip weight and a piece of cardboard cut to prop up the outer wing panel when gluing. This gives the correct dihedral angle. There is no full sized plan as, with everything being done for you, the kit only needs the guide provided to complete the project. For those new to aeromodelling the thickest part of the wing is about 1/3 of the wing chord back from the front of the wing, referred to as the leading edge. The rear section of the wing has the flat taper down from the thickest part ending in 1/32” thickness. This is known as the trailing edge. You will need to know this during the build.
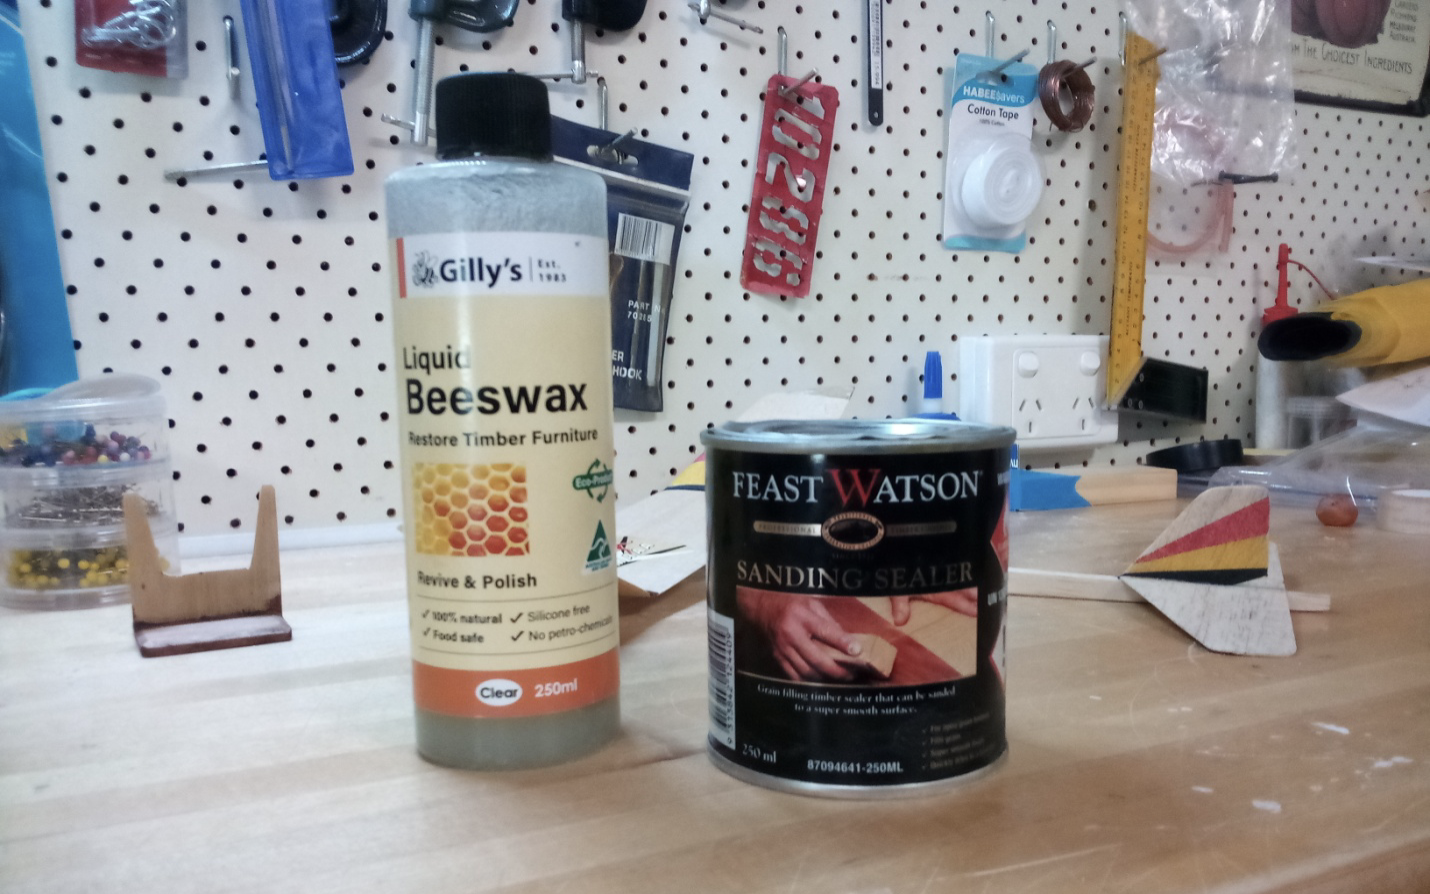
You will need to have some glue (preferably 5 minute epoxy) for the joints when building this model and I also recommend Sanding Sealer and Liquid Bee wax. The ones Michael Towell put me onto are shown in the picture being Gilly’s Liquid Bees Wax and Feast Watson Sanding Sealer. Both are easily available from hardware shops here in Australia.
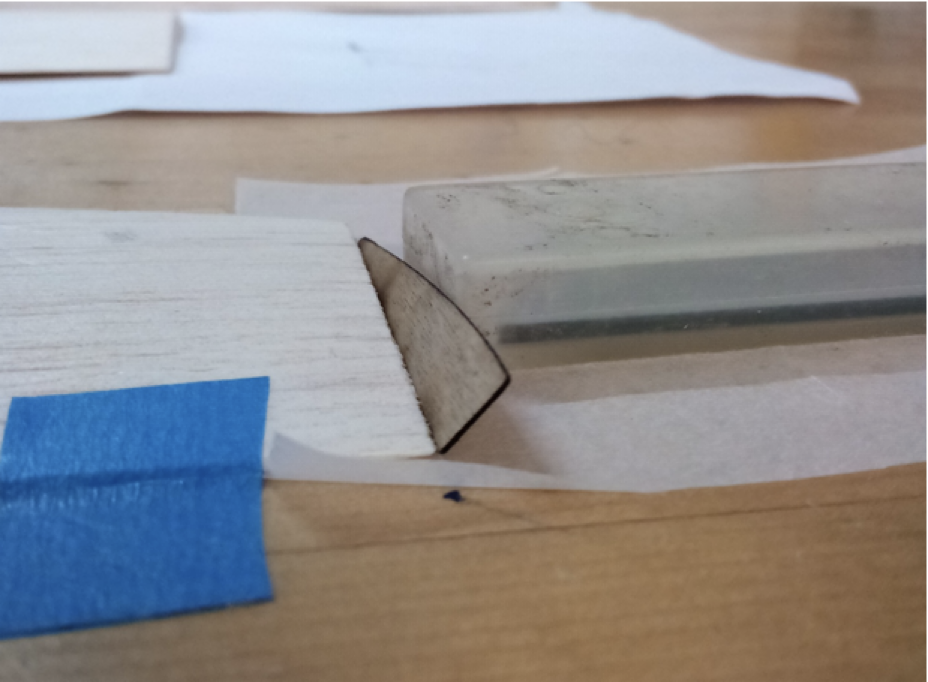
The initial part of the model assembly is to glue the “Michael Towell” wing tips to the outer wing panels. These are the small, very thin plywood parts supplied in the kit. Note the correct placement shown in the parts layout in photo 1. The highest point goes to the rear and lines up with the trailing edge of the wing. Use the wax paper supplied in the kit to put under each joint as you glue it. These tips should be at 45 degrees to the building board so they are at the correct angle when the wing is complete. This is shown in the next photo. Lightly sand the leading edge at the wing tip to blend it into the “Michael Towell” winglet.
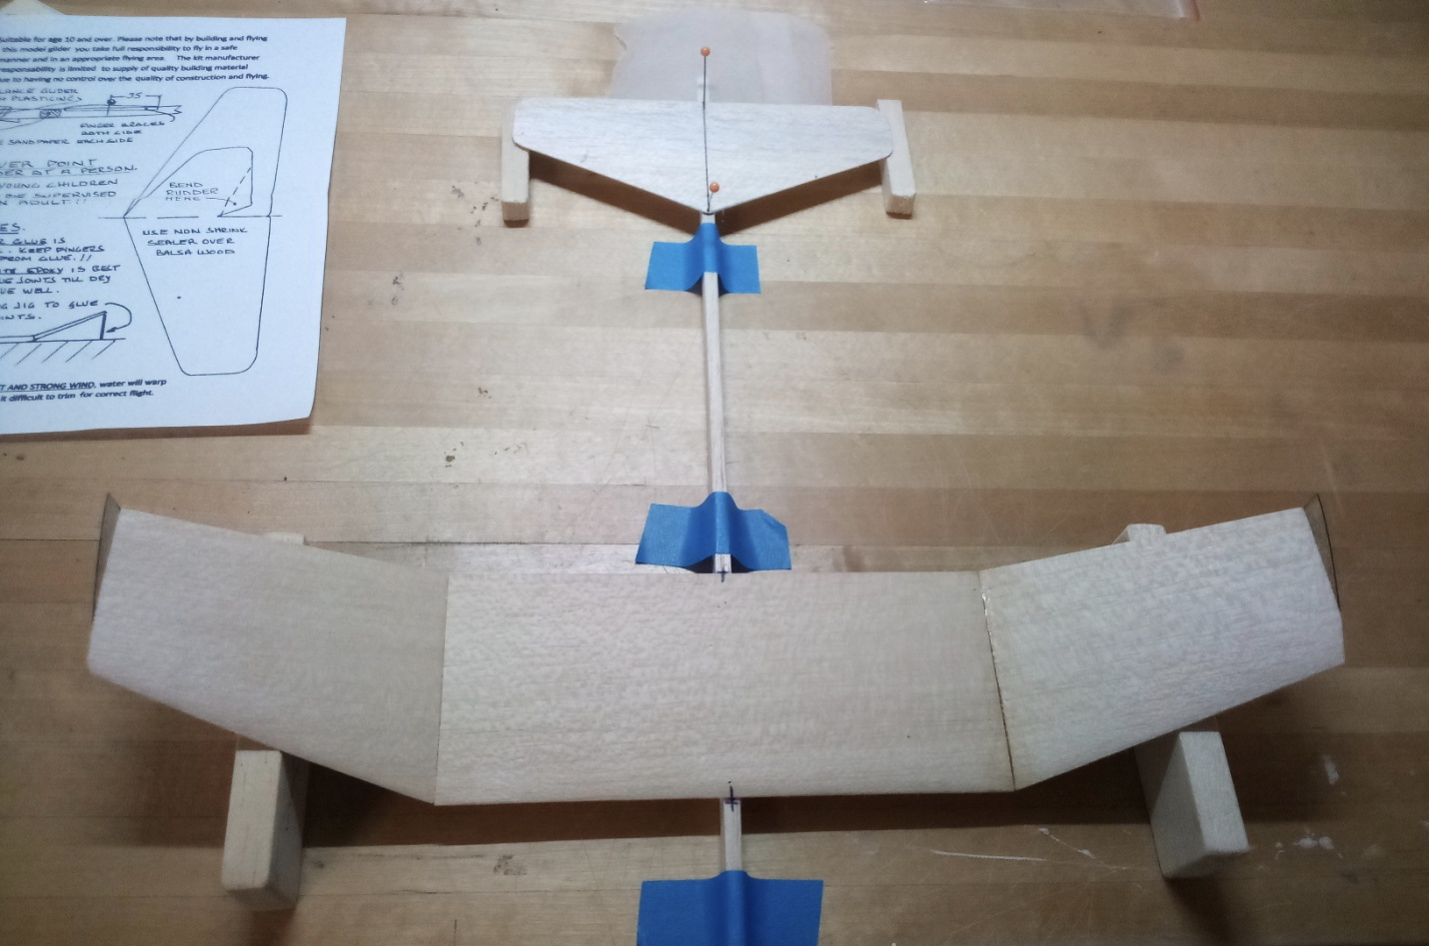
Follow the supplied instructions from here. I taped the cardboard jig to a piece of 2” by 1” timber to help hold the jig in place when gluing the outer wing panels to the centre panel. The jig is used to get the correct dihedral angle. Note the flat wing centre panel taped to the building board.
I taped the fuselage down to keep it in place and used a small piece of packing under the tail end as the bottom of the fuselage tapers upwards toward the rear. I then glued the wing then the tailplane in place. You can keep the wing and tailplane in alignment when viewed from the rear which is what I did as I wanted to see what the model would fly like with no tail tilt
If you want to put in a little more work to assist the model to turn in the glide you can tilt the tailplane by making the tip of the tailplane 2mm to 3mm lower than the centre where it is glued to the fuselage. Which way to tilt the tailplane depends on whether you are left or right handed. If you are right handed like me you will want the model to launch out to your right then settle into a left turn glide. To get the left turn glide the right hand tip of the tailplane should be the lower part when viewed from behind. If you are left handed then you will probably find it easier to tilt the tailplane the opposite way and launch the model out to your left and have it settle into a right turn glide. Using rudder adjustment to get the correct glide turn may cause the model to spiral in if its speed increases in a thermal turn due to increased effect of rudder. It will also offer some drag during the launch. Tilting the tail has no effect on the launch but does help the model to turn in the glide. Having the tailplane tilted will also mean less plasticine under the appropriate wing tip. There is no real need to try to sand the tilt angle onto the top of the fuselage as the tailplane can easily be pinned and glued with 5 minute epoxy then check the tilt before the epoxy cures. Give the epoxy time to cure between each step. Now glue the tailfin in place ensuring it is perfectly vertical and in line with the fuselage. Finally glue the triangular shaped finger braces under the wing each side of the fuselage with the wide point lined up with the trailing edge.
Once the model is fully assembled it is best to give it two coats of sanding sealer. The sanding sealer will be very good for the job and won’t warp anything. Stir the contents of the tin really well before use, as it will have settled out in the bottom. Apply sealer by very lightly brushing on one coat then once dry sand it back as much as possible, but be careful not to sand away the balsa. Use 600 grit sand paper for this job. Not the one supplied in the kit. You will see fine white dust coming off as you sand. Wear a mask for this job. Apply the second coat in the same way. Be careful not to start adding unwanted weight when doing this. I use a quality flat brush 6mm wide for lightly brushing on the sanding sealer.
At this point you can add a little trim colour to make it your own and help it stand out when you are searching for it down the paddock. Also put some contact details on the model. Len provides a small sticker in the kit to write your phone number on. Also apply the Sting 15 Mk2 sticker at this stage as it won’t stick to the model after it has been waxed. If you plan to use it as a hand launch glider then glue the small pieces of wet and dry sandpaper each side of the fuselage just in front of the wing leading edge. This gives you good grip here when launching the model by a hand throw.
The next step is to very gently rub on a coat of Liquid Beeswax. Shake the bottle very well before use. I wrap a piece of soft cloth over my fingertip and tilt the bottle up to wet the cloth. Now gently rub it onto the model and spread it as far as possible before getting more onto the cloth for the next area. Once the Beeswax has been rubbed on, get a large piece of soft cloth and carefully buff off as much wax as you can. This will water proof the model and help stop it from warping if it gets wet. If the ground is damp when you are out flying then Len suggests some paper towel to wipe the moisture off the model after each landing.
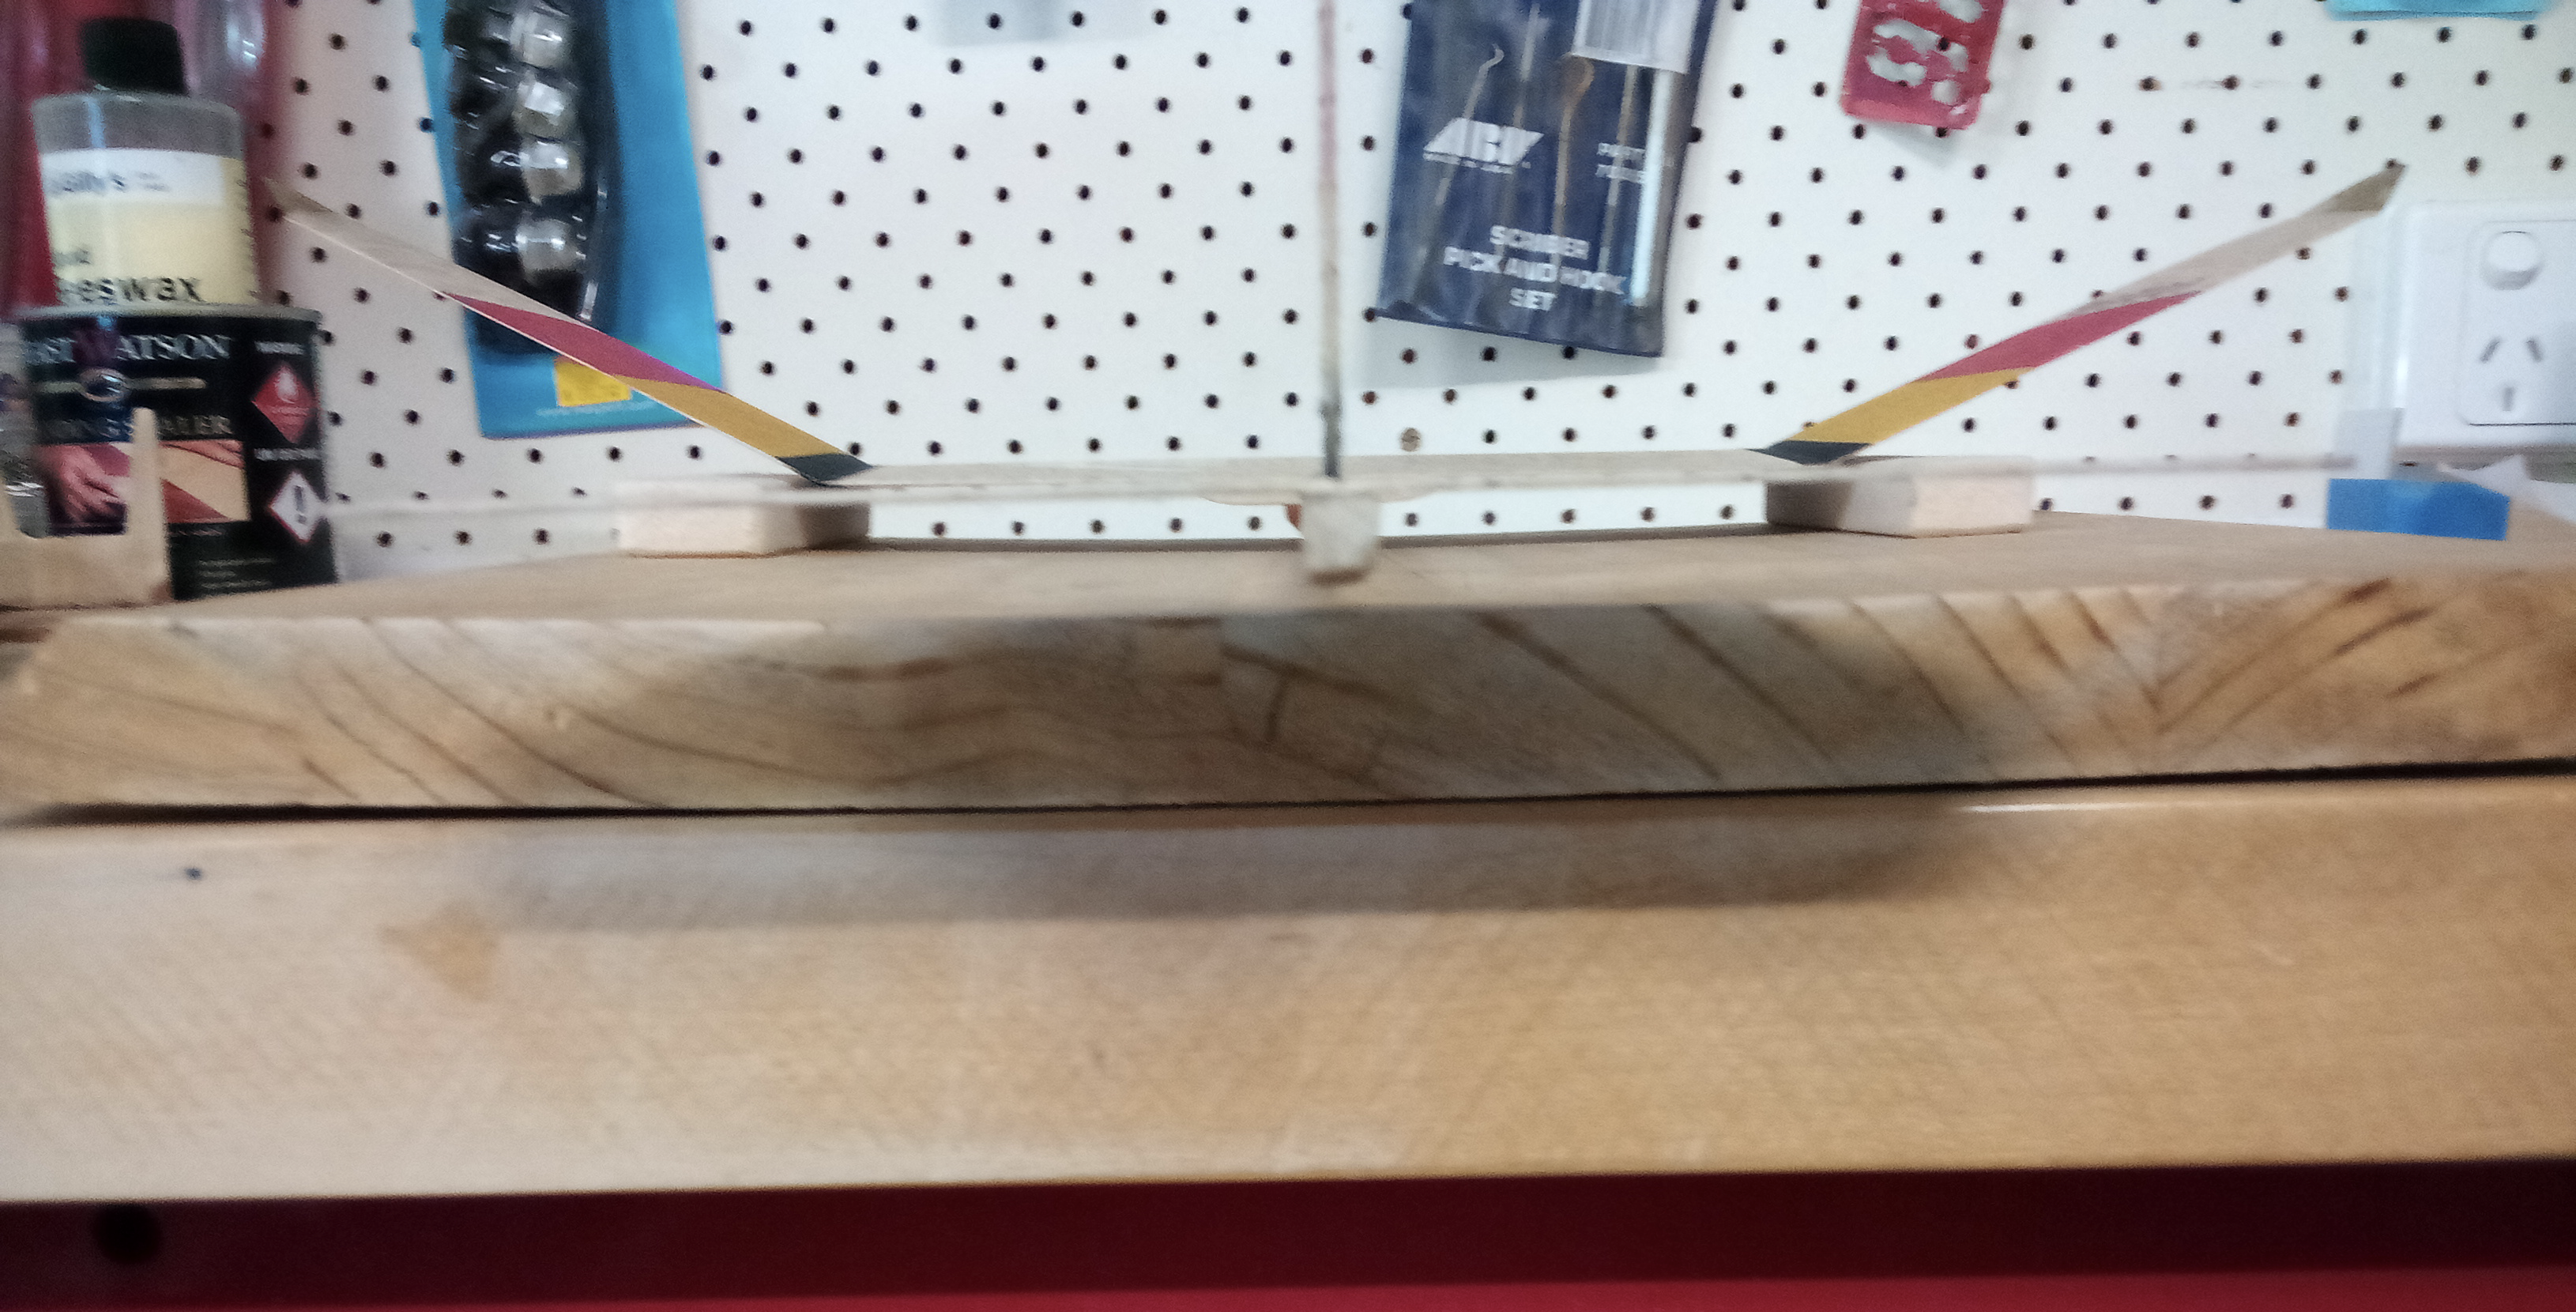
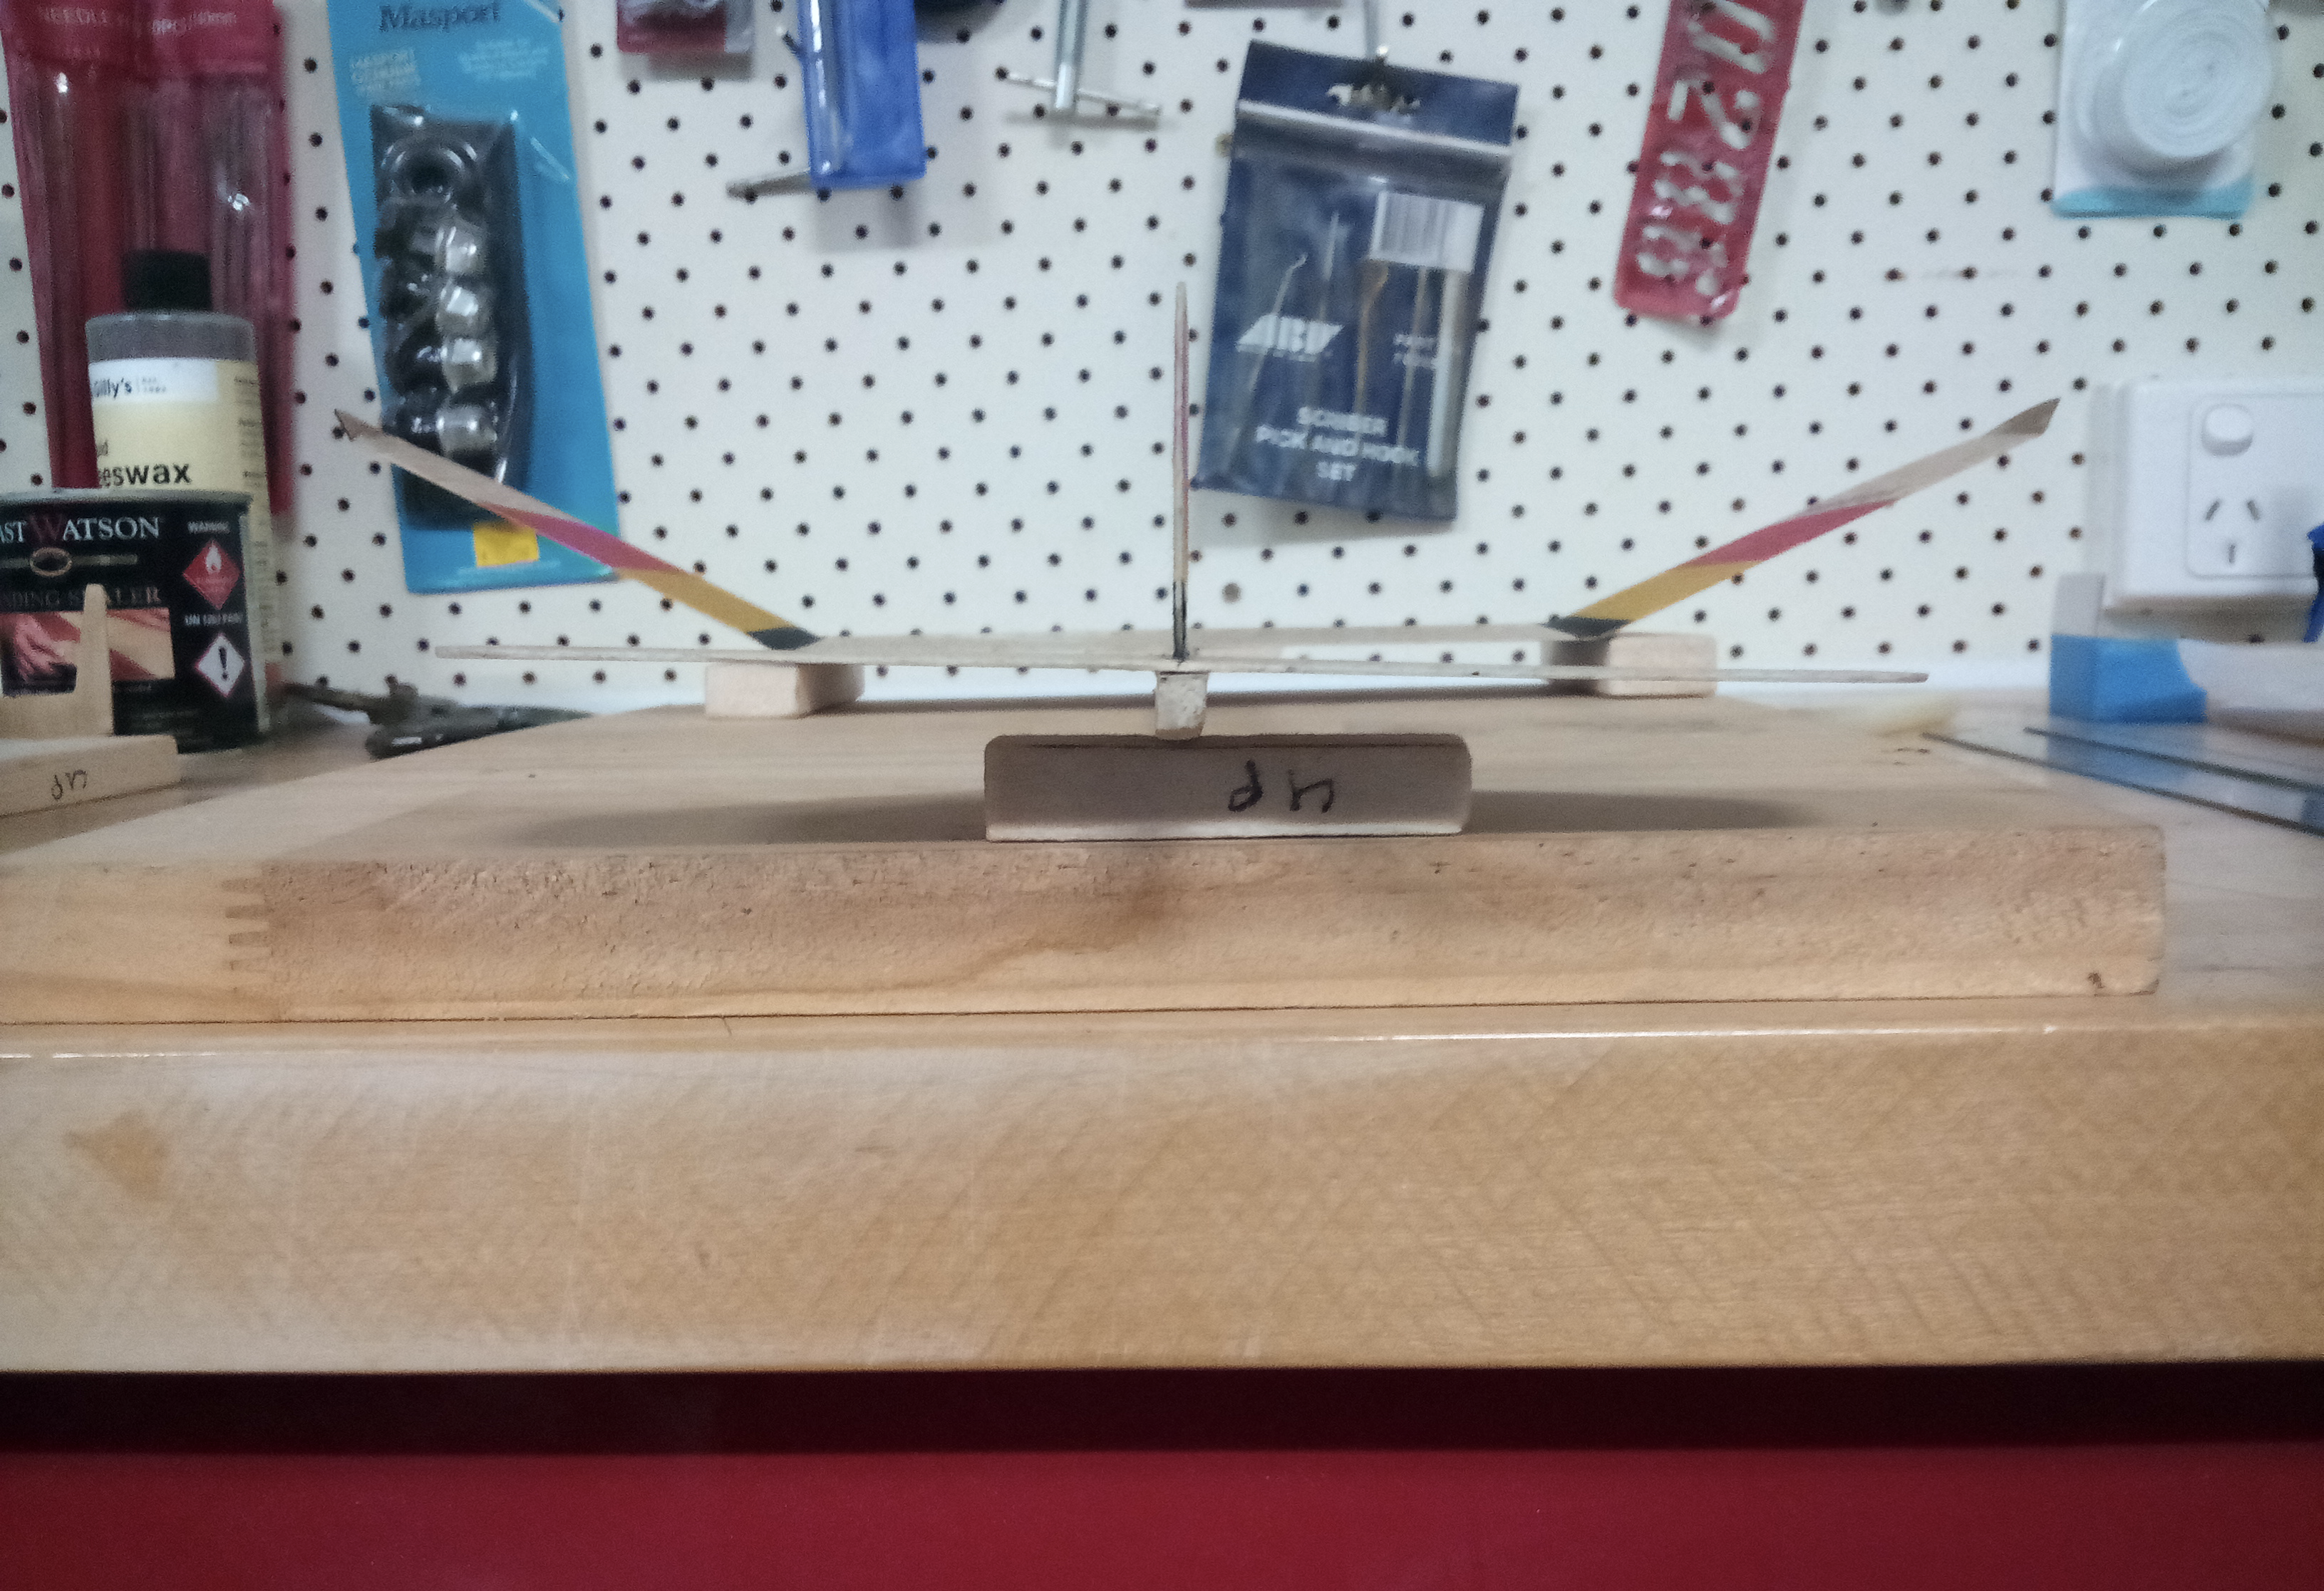
You will need to balance the model according to what is shown on the guide provided. This is at a point 35mm forward of the trailing edge of the wing. As a guide, my model used almost all the plasticine provided in the kit. Also note the finger braces glued under the wing each side of the fuselage. The wide point goes to the trailing edge
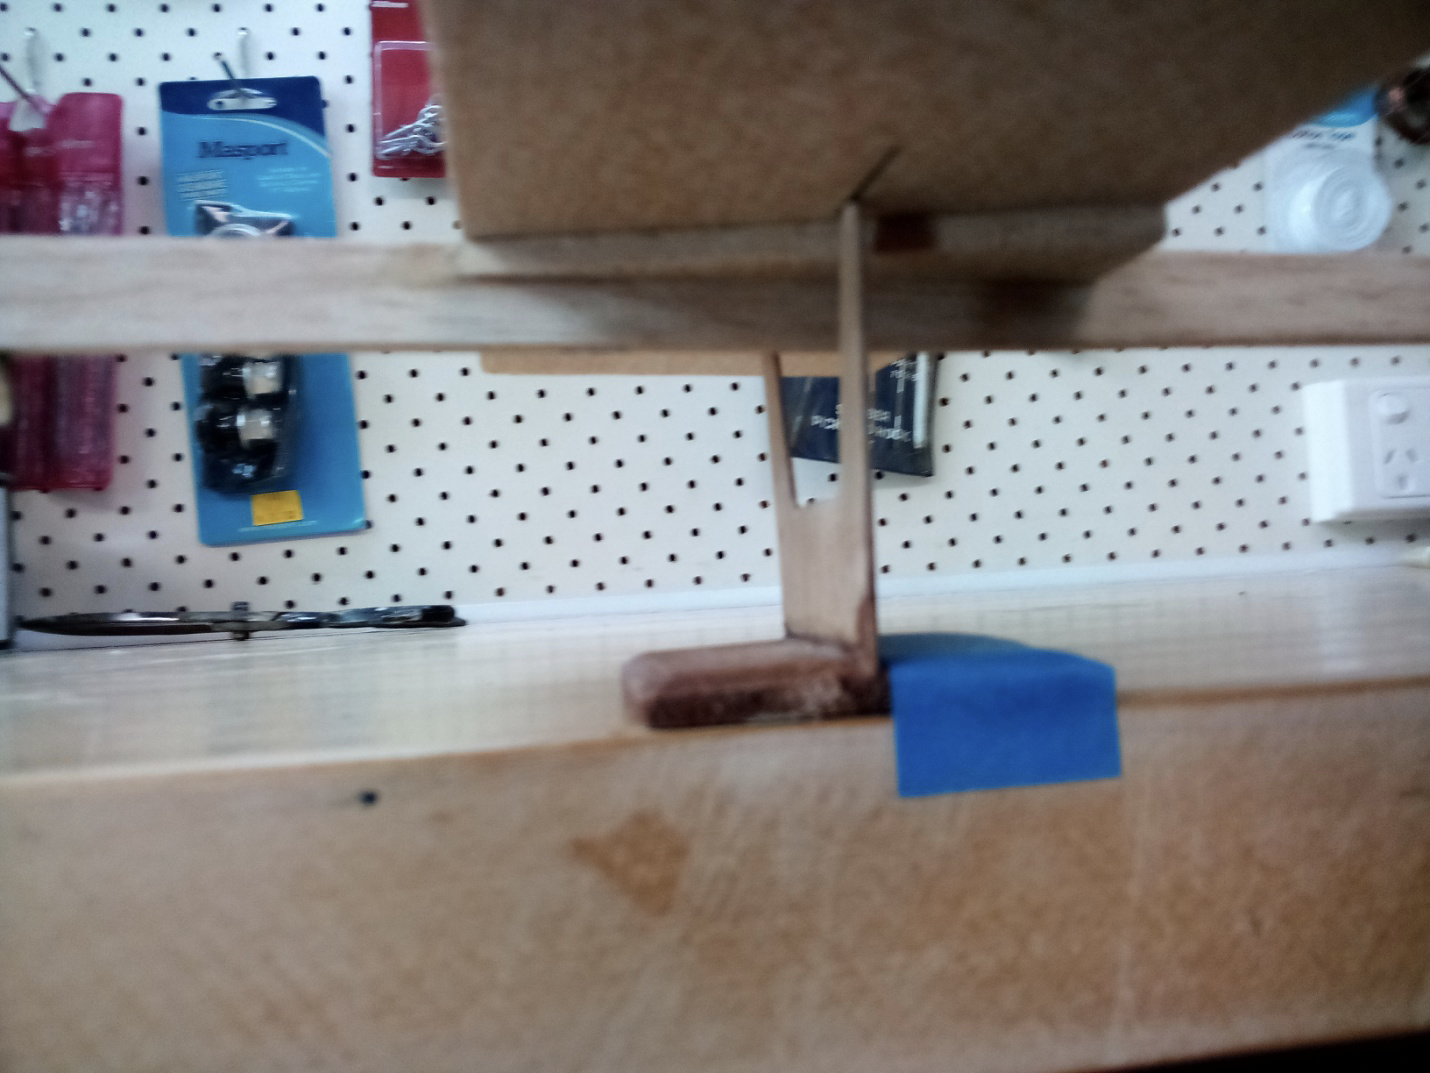
I made up a jig from thin plywood to balance my gliders. It is more accurate than balancing the model on your finger tips. See the next photo with the model balanced on the marked lines. If you don’t wish to go to the trouble of making up a balancing jig then your finger tips will be near enough. This balance may need to be adjusted when test gliding the model but it is a good starting point and any adjustment from here should only be done with very small changes to the plasticine nose weight.
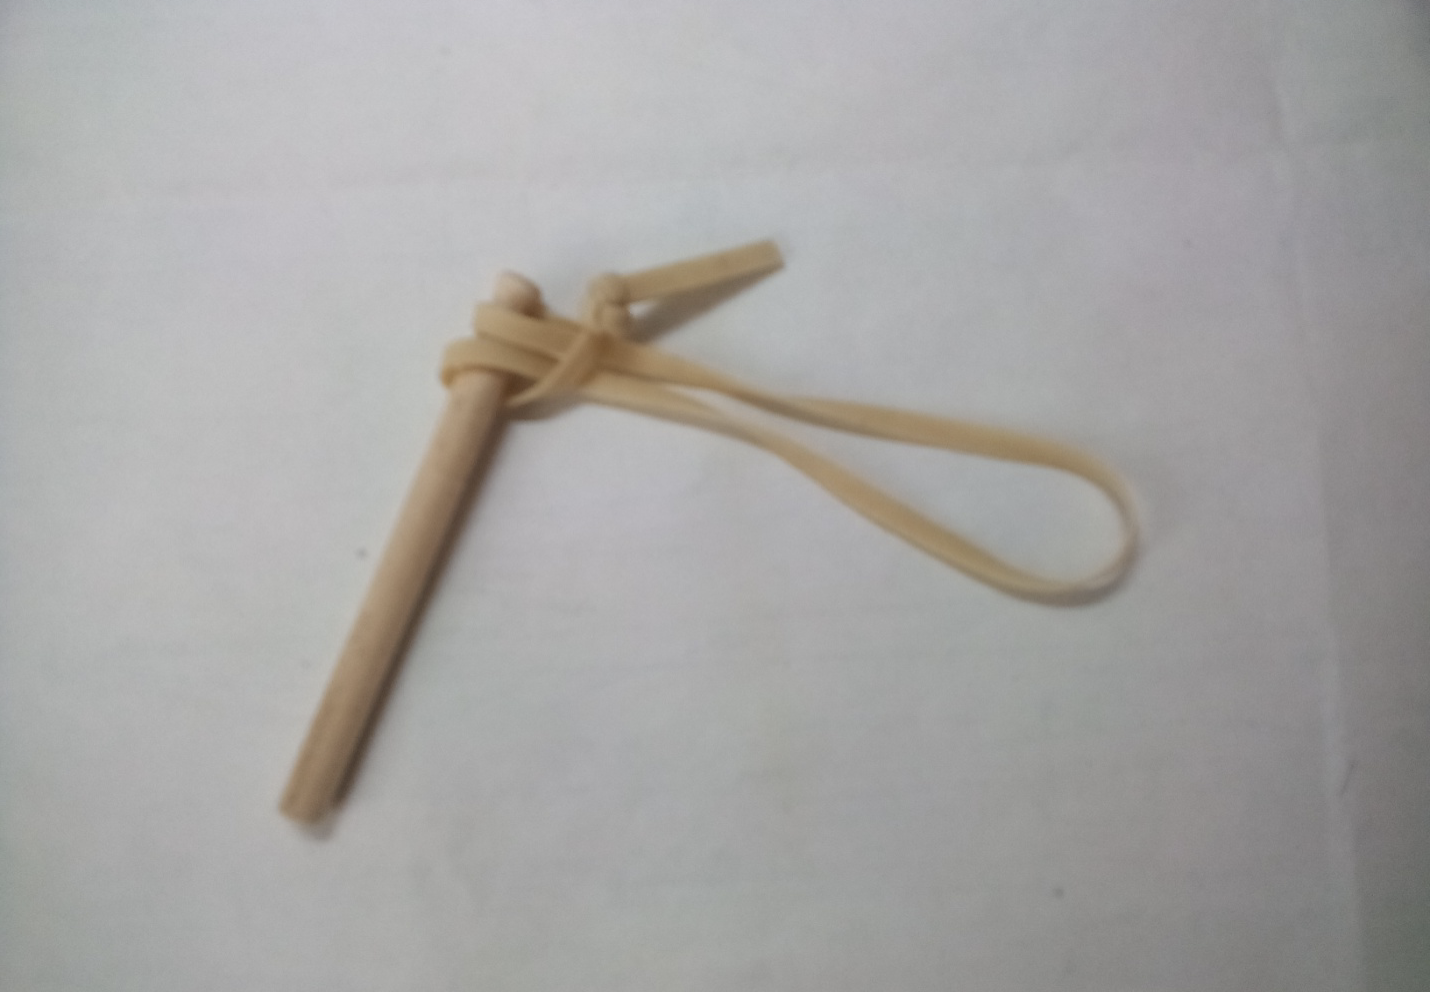
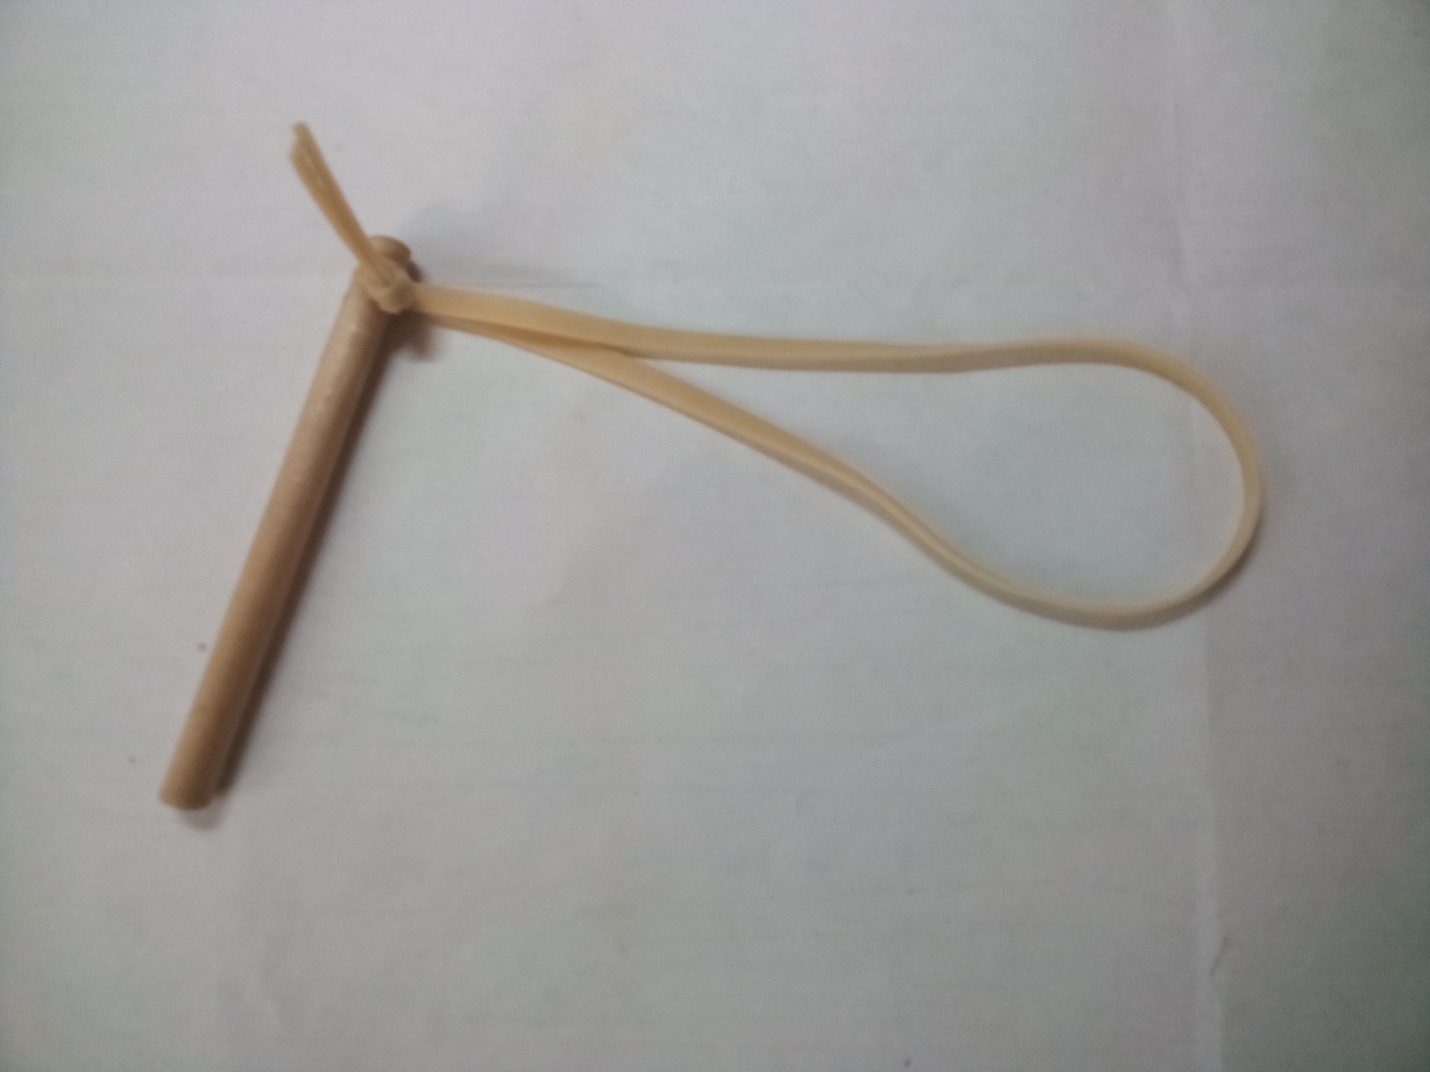
Next you can make up the catapult launcher by looping the rubber supplied back over itself and wrapping it around the grooved end of the wooden dowel then pull very tight to lock it into position. See the next photos.
A few gentle test glides will soon indicate if the balance is good and if the model is going to do a nice gentle left turn. Pick a totally calm day for this. Grip the fuselage sides under the wing between your thumb and pointer finger then, with the model slightly nose down, and give it a gentle throw. Do this a few times as a puff of breeze can make it look like a bad test glide. Make sure it has a gentle turn on the glide. If there is a very gentle breeze throw the model a little to the right of the oncoming breeze. Follow Lens instructions to get the trim flights right.

To get more turn on the model begin by adding some plasticine under the wingtip of the inboard wing. A piece less than the size of a pea will have some effect. Squeeze it down quite flat to streamline it as much as possible. This can be seen in the above photo. In this case the added plasticine is assisting a left turn. Very small bends to the tailfin can be used if necessary to add a bit of rudder to help the turn but only do this down low on the tailfin. Any bending or twisting up high on the tailfin will create other problems.
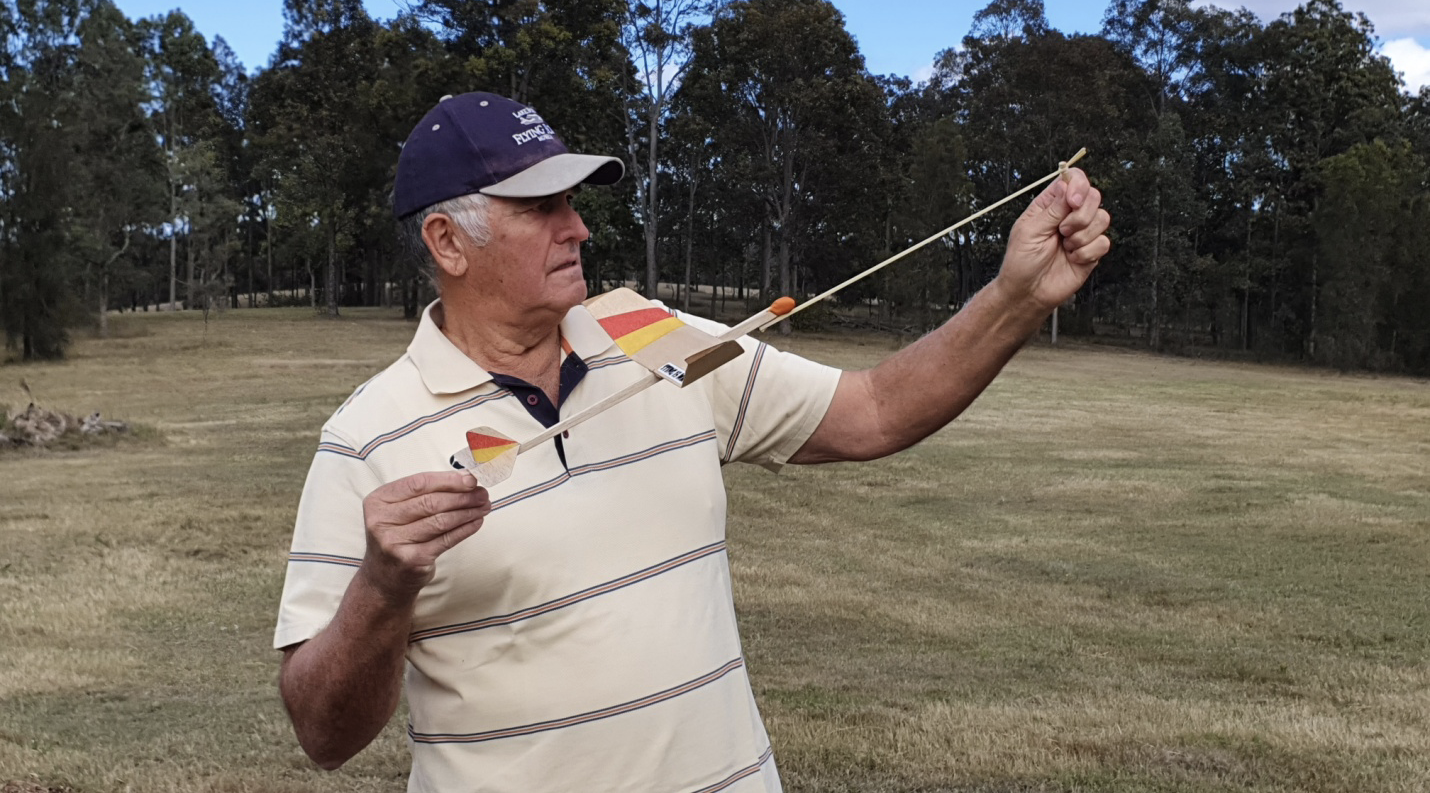
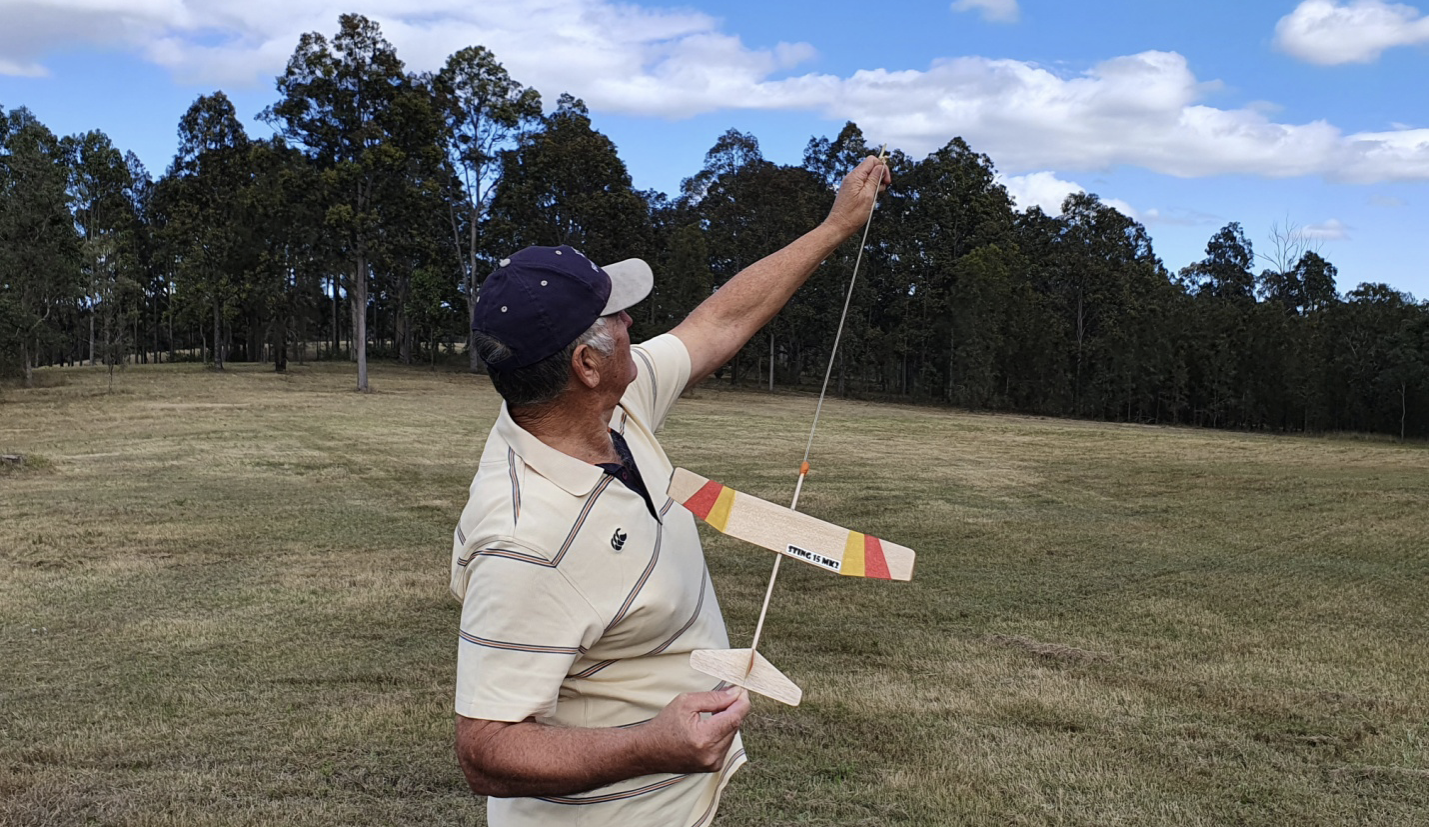
For the catapult launches find an area with a lot of room so the model doesn’t fly into trees or buildings etc. I think the initial catapult launches should be low powered and only about 30 degrees upward to assess the launch, glide and turn. If the model isn’t turning enough it will go a long way from the launch point. Len’s instructions suggest a good turn would be about 15 to 20 metre diameter circle. After hooking the elastic over the skeg near the nose of the model firmly grip the model at the rear of the fuselage as shown in the next picture. With the wings close to horizontal and the model angled a little upward as suggested, stretch the elastic as shown to get a small amount of tension on it. You don’t want much tension at this stage. Release the model and watch for a nice level glide and a gentle left turn.
Once you are happy with the initial launches, glide and turns you can get more serious. You need to hold the model banked well over to the right and angle it upward at about 60 degrees then stretch back the rubber to get more tension on it than you have been using. Build up the tension a bit at a time for each launch to the point where you are really stretched out for a full powered launch. Remember if you are left handed bank the model over to the left for the launch and the glide circle should be to the right. When you are getting nice high launches with good transition into a lovely glide just repeat that for a while and enjoy watching the model fly. There is plenty of time to further build on more powerful launches.
Launching with the catapult is certainly an easy way to get high launches and good flights but it does still take practice to get the very best launches and flights.
The other option for launching this model is the hand launch method. This can be fun but it takes a while to get the technique just right for those really good launches. If you can master the hand launch you will get a lot of satisfaction from this as well. You need to grip the fuselage between your thumb and middle finger forward of the wing leading edge and your pointer finger behind the finger tab at the trailing edge of the wing.
For the actual launch the model needs to be banked well over to the right and thrown quite firmly upward at an angle of about 60 degrees. The right bank helps the model turn to the right in the climb after you throw it. Pick a spot in the sky for each launch, if there are any clouds, and try to aim for that on each throw. Don’t go for full powered throws initially as you will end up with inconsistent throws making it difficult to assess your technique. Use firm throws then as you get consistent start to build up the power. If you think you need to make the model climb a little more on the throw there is provision under the rear of the tailplane where you didn’t glue that last bit to the fuselage. Insert a small wedge shaped packing piece here to give
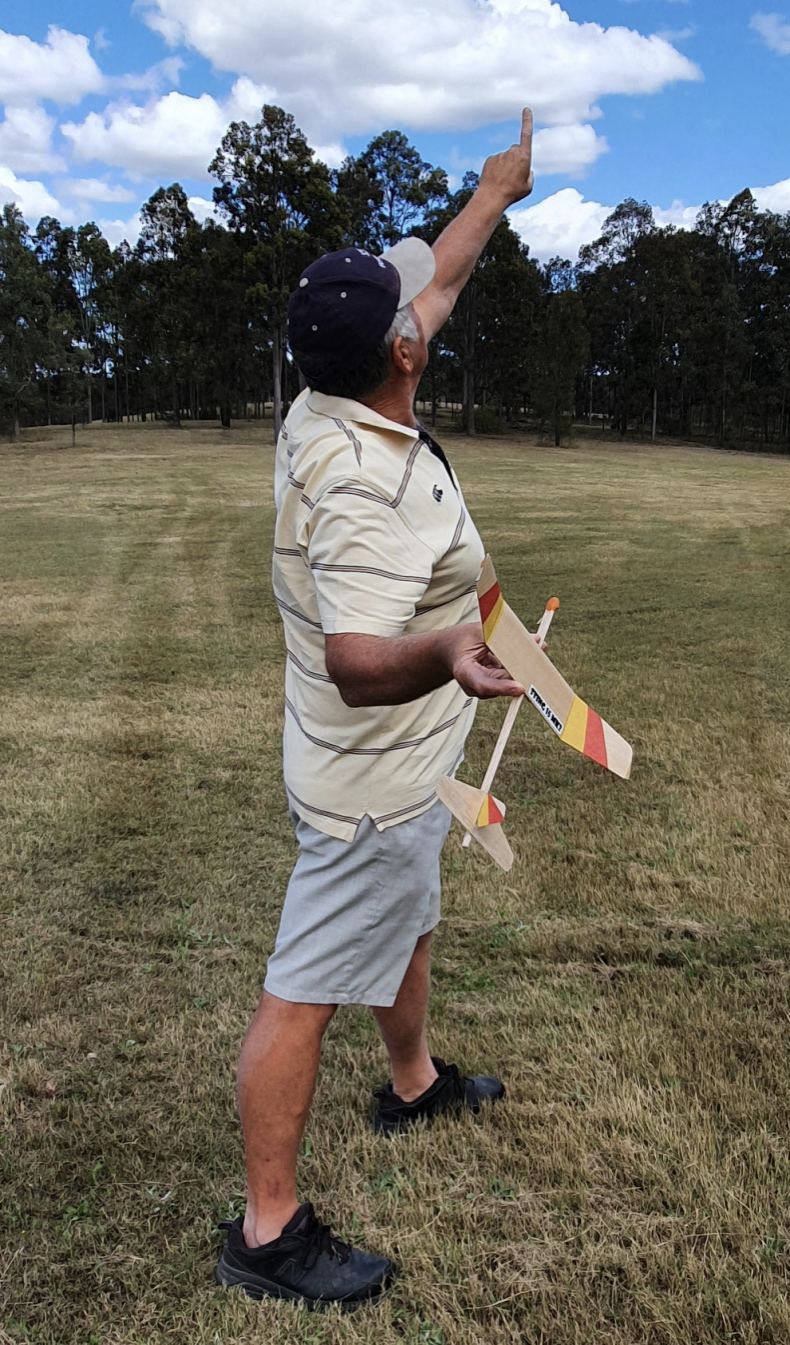
the effect of a little bit of up elevator then try again. Only make small adjustments until you get it right. A small amount of rudder can be applied if needed but only put in a small bend down low on the tailfin. Bending it near the top of the tailfin will cause other problems. When throwing the model you need to try to keep the banked angle and the upward launch angle right through to the release of the model. This will give the best launch but takes a lot of practice. It can be very helpful to have someone watch the launch from behind and tell you if the bank and upward launch angle are wrong when you release the model, as it is very hard to see this when you are doing the launching.
I recommend only flying this model in the morning while the air is still quite cool or in the evening as the air is cooling off if it has been a warm day. Do this when there is no breeze preferably, or only light breeze. If there is any breeze launch a little to the right of the on coming breeze. Through the day is OK if it is a cool day with no breeze or only the slightest breeze. Avoid thermally conditions because this model will very easily get into a thermal and fly away. It is only intended to be an entry level model so has not been fitted with a dethermaliser which would save it from being lost in a thermal. Find a big enough area to do these trim flights and make sure you read all the details on the building and trimming guide before you begin the project.
I found this model to be a very easy build and a great flyer, being very easy to get a good launch and flight trim on. You will enjoy this model. This model would be competitive in a Catapult Glider Contest if you chose to do this but Len does also have a more serious contest model in his range.
Have a look on Len’s web site www.stingmk2gliders.com for the range of gliders now available and see what is planned for the future. Anyone can enjoy this kit.
Len is going to organise a “shoot out”, at the West Wyalong Nats, for Sting 15 Mk2 gliders. It will be late in the evening on a suitable day. All contestants will line up then launch at the same time with the last one down receiving a kit to the Sting 15 Mk2. Get your orders in to Len, get building and be there! To save on postage get a few mates to put in an order with yours.
Happy flying.